
Back in May, my husband asked for a new dice bag for his birthday. He plays tabletop roleplay games like Warhammer and Bolt Action, and has quite the collection of dice! I have made him a few bags now, in a whole host of colours and sizes - I always try to match the colour scheme to the particular game he is playing.
(I've also made him a bag for Nerf darts, but that's a different story!)
This time, he had a specific request: he wanted the bag to be able to stand up and stay open, unsupported, so that he could reach in and select dice without lookihg.
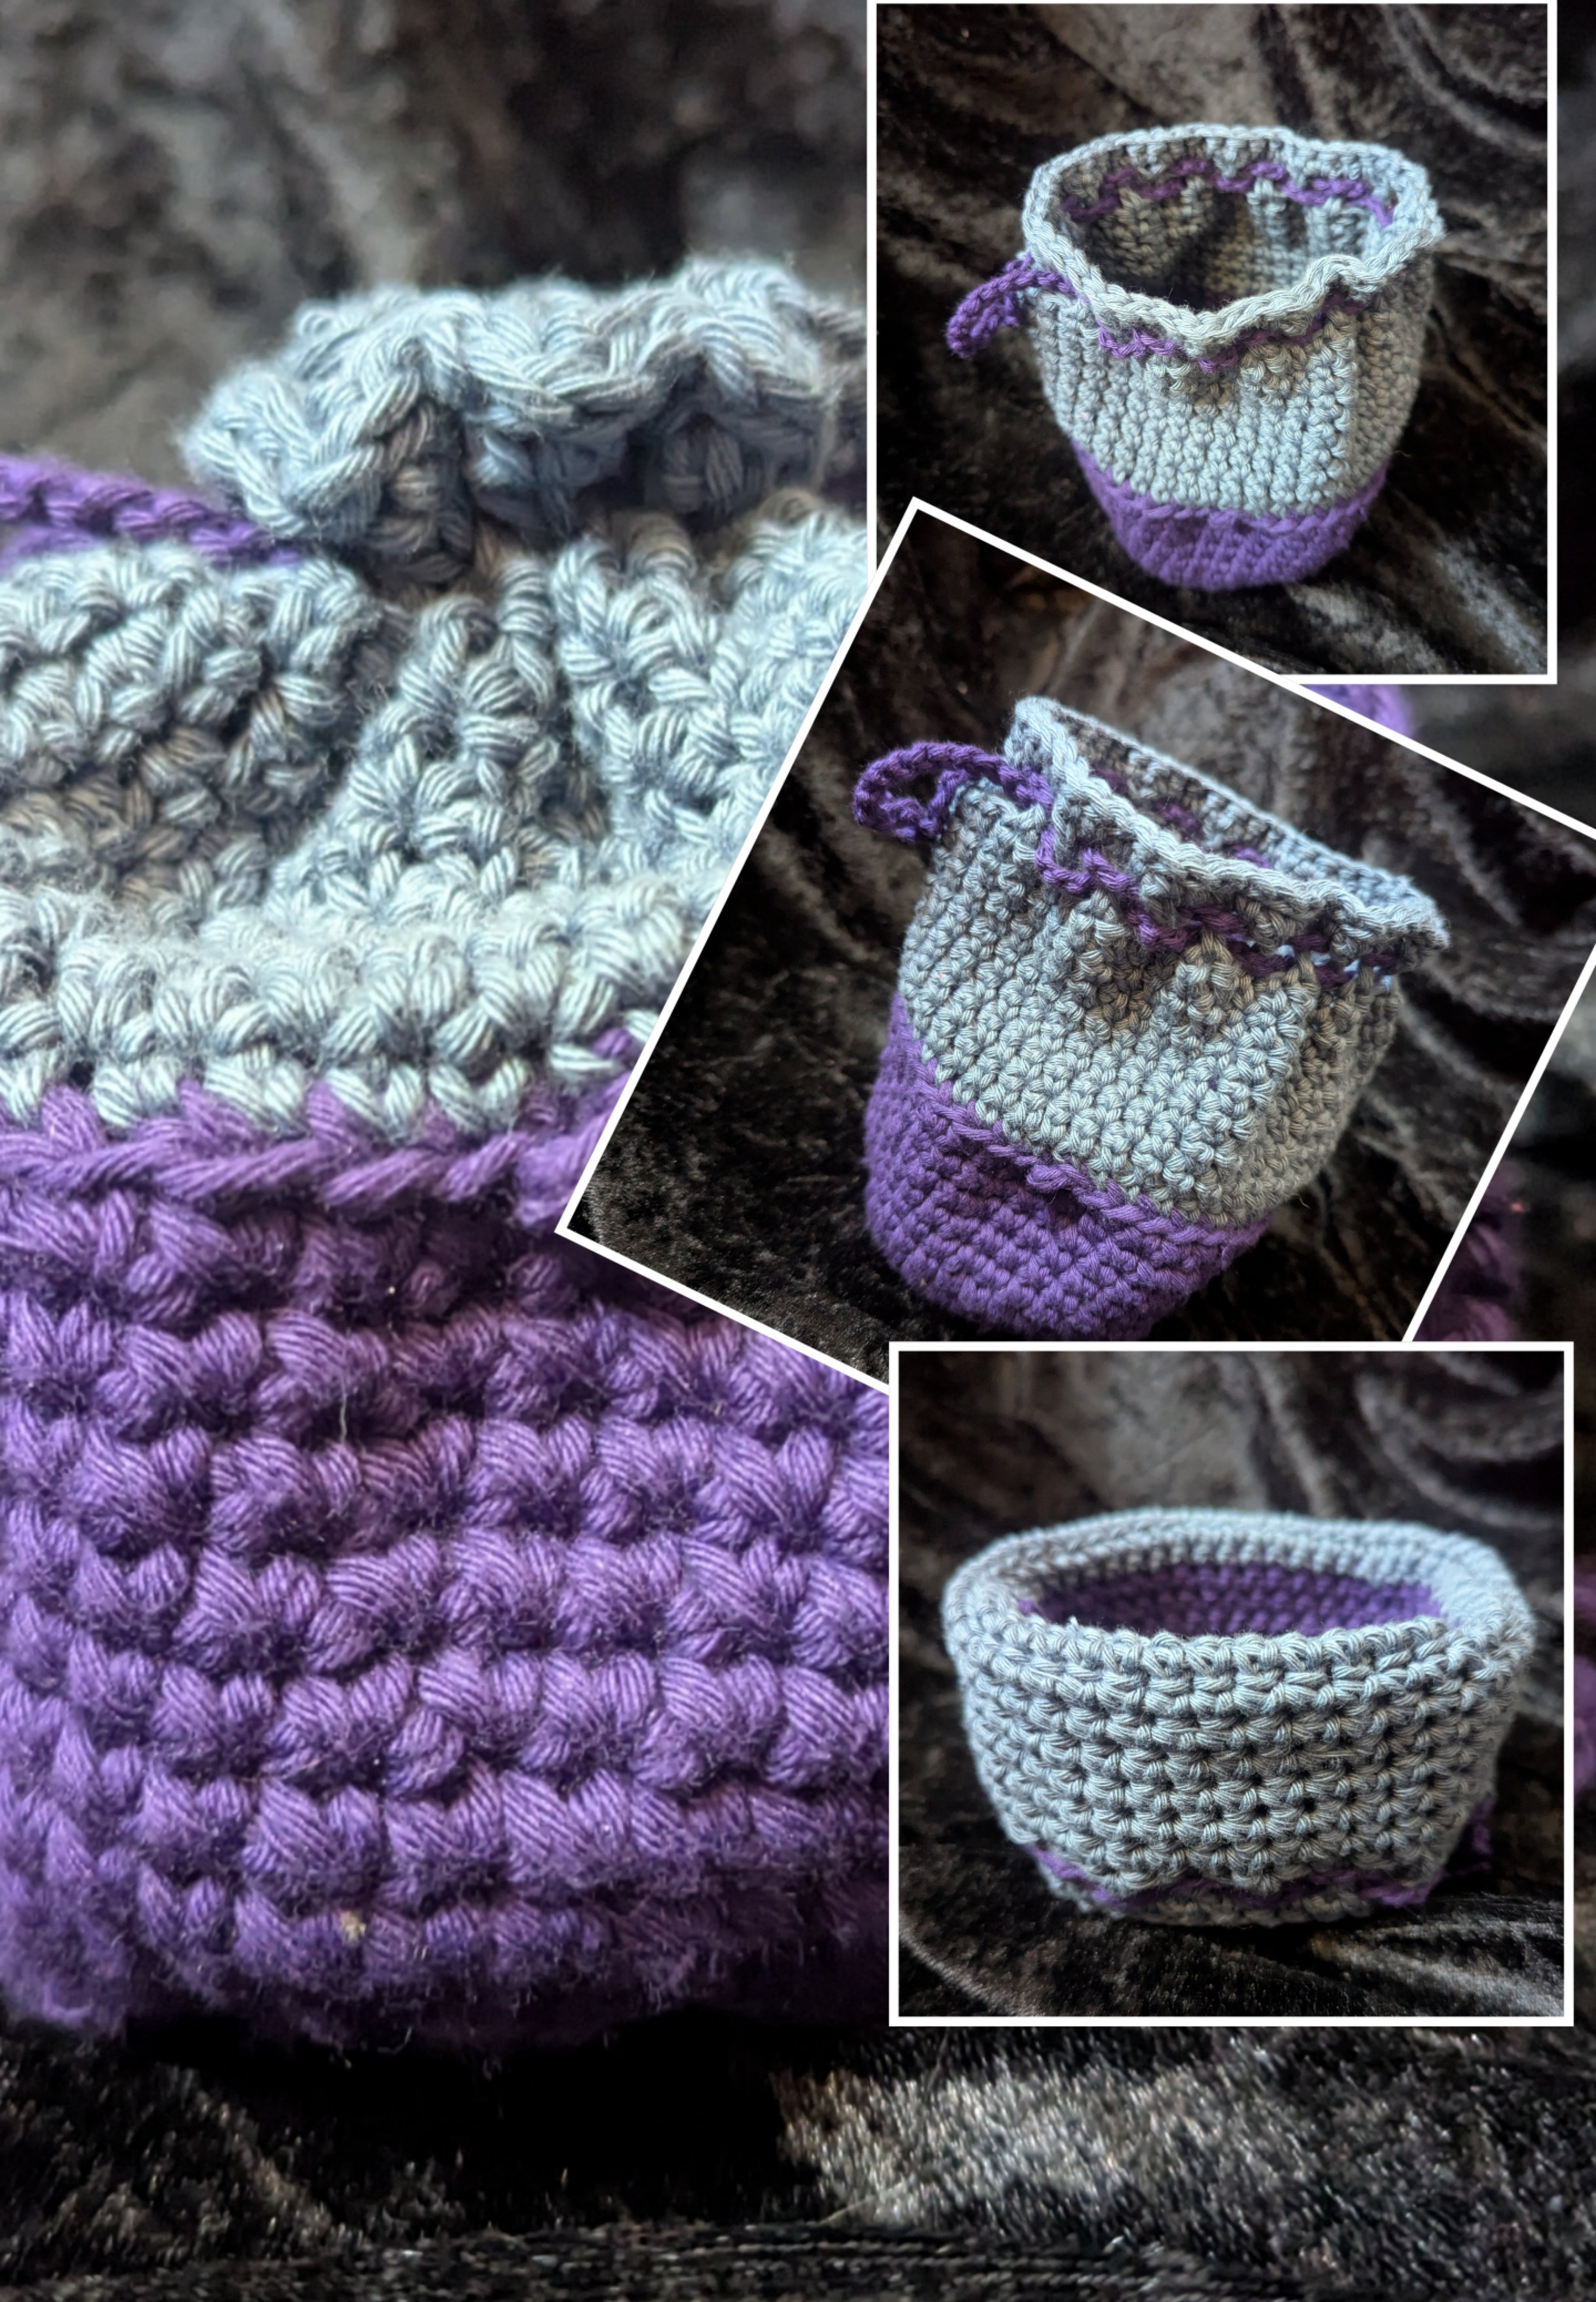
So, I dove into my (extensive) yarn stash, put my thinking cap on, and came up with the Basket Bottomed Bag.
It's constructed from 100% cotton to give it extra stability and has a really sturdy base with a looser top that can be folded down to turn the bag into a basket! I've made three now, and I love them all - and my pattern testers have been really enthusiastic about it too.
You can buy a .pdf version of the pattern from my shop - it includes access to a full video tutorial to give you a little extra help, and a Lookbook showcasing the bags that my testers made.
But if you'd just like the basic instructions, keep scrolling for a free version!
You will need:
Colour A – 65 metres of Aran weight cotton yarn (or 130m DK weight held double)
Colour B – 60 metres of DK weight cotton yarn
3.5mm crochet hook
4.0mm crochet hook
SCiSSors
Tapestry needle
Gauge
Gauge is not vital for this pattern, but will affect the size of your finished bag.
My gauge: first six rows of pattern = 10cm diameter flat circle
Notes
This pattern is written in US terms.
The pattern is worked in a spiral – at the end of each round you will NOT join or turn your work, unleSS otherwise stated.
I recommend using a stitch marker to mark the first stitch of each round.
If you would like to make a smaller or larger bag, the amount of yarn you need will be leSS/more than stated above.
[Number in square brackets] shows the stitch count for that round.
(Instructions in brackets) are to be repeated as indicated.
Abbreviations
SC – single crochet
INC – increase
BLO – back loop only
DC – double crochet
CH - chain
SS – slip stitch
SK - skip
ESC – extended single crochet (see special stitches)
ST - stitch
Special stitches
Extended single crochet
Insert hook into the appropriate stitch, yarn over and pull through (two loops on hook) – yarn over and pull through the first loop only (two loops on hook) – yarn over and pull through two loops – this will complete the stitch, leaving one loop on your hook
Standing SC
Pull up a loop roughly as tall as a normal SC stitch - insert hook into the stitch at the base of this loop - yarn over and pull through (two loops on hook) - yarn over and pull through both loops - this will complete the stitch, leaving one loop on your hook
Standing DC
Pull up a loop slightly taller than a normal DC stitch - hold the top of this loop firmly against your hook with one finger until the stitch is complete - twist the loop, winding it around your hook once - insert your hook into the stitch at the base of the loop, yarn over and pull through (three loops on hook) - yarn over and pull through two loops (two loops on hook) - yarn over and pull through two loops - this will complete the stitch, leaving one loop on your hook
(I highly recommend placing a stitch marker in the top of this stitch so that it is easier to find when working into in on the next round.
Pattern
Start with colour A and a 3.5mm hook
The stitches in this section should be very tight!
-
1. Make 8SC into a magic circle [8]
- a. OR CH2, then make 8SC in the first chain stitch that you made
- 2. INC (make 2SC) in each stitch [16]
- 3. (SC, INC) x8 [24]
-
4. SC, (INC, 2SC) x7, INC, SC [32]
- a. Pull the magic circle as tight as possible using the tail left at the start of your work. You may be left with a small hole – this can be resolved by sewing a few stitches across it with the tail, on the inside of your work. Weave in the end.
- 5. (3SC, INC) x8 [40]
- 6. 2SC, (INC, 4SC) x7, INC, 2SC [48]
- 7. SS BLO to the first stitch of round 6, SC BLO in each remaining stitch [55]
-
8. SC in each stitch [55]
-
9. Repeat round 9 until the basket is just less than half the total desired height of your bag – I worked eight more rounds [55 ST per round]
-
10. SS to first stitch of round.
Fasten off with an invisible join
Change to colour B and 4.0mm hook
- 1. Join yarn with a standing SC in the back loop of any stitch. SC BLO in the next stitch and every other stitch [55]
- 2. ESC in each stitch [55]
- 3. (CH1, SK1, DC) around, SS to standing DC
- 4. Standing SC in next stitch, then SC in each chain space and stitch around [55]
- 5. SS in each stitch [55]
Fasten off with an invisible join
Weave in all ends
Cord
Make two.
Chain to approximately 1.5x the stitch count of the final round of your bag – each cord should be just longer than the diameter of the top of your bag.
Thread through the eyelets in your bag as shown in the diagram. Tie the ends of each cord together.
Optional: add beads, tassels or other decorations to the ends of your cords.
Congratulations!
You have completed the pattern and have a lovely new bag!
I would love to see your creations.
Please feel free to tag me on Instagram (@stitchcraftstudio.harrogate) or drop me an email (jeni@stitchcraftstudioharrogate.com)
0 comments